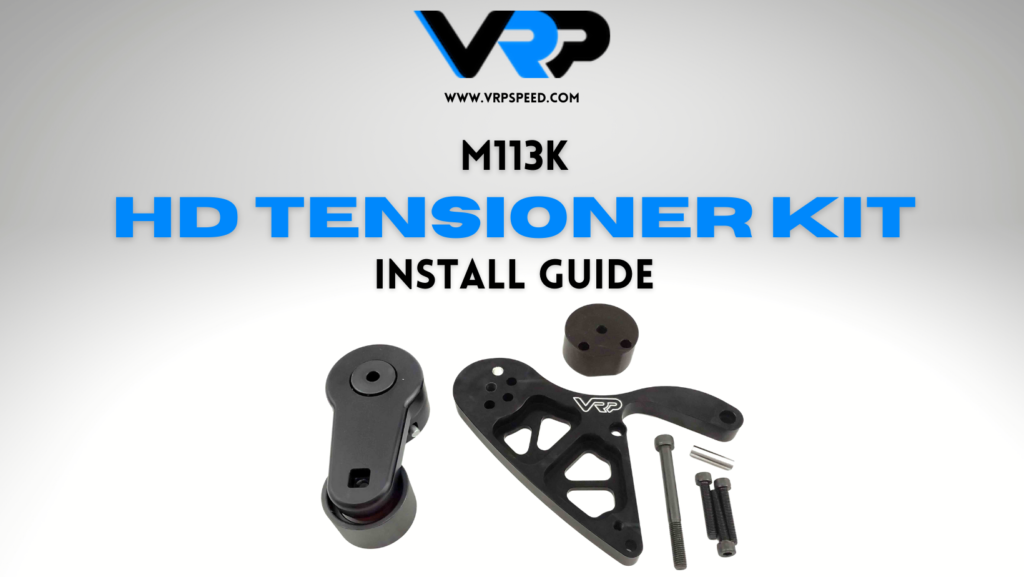
VRP DS HD Tensioner Kit Install Guide
About the Kit:
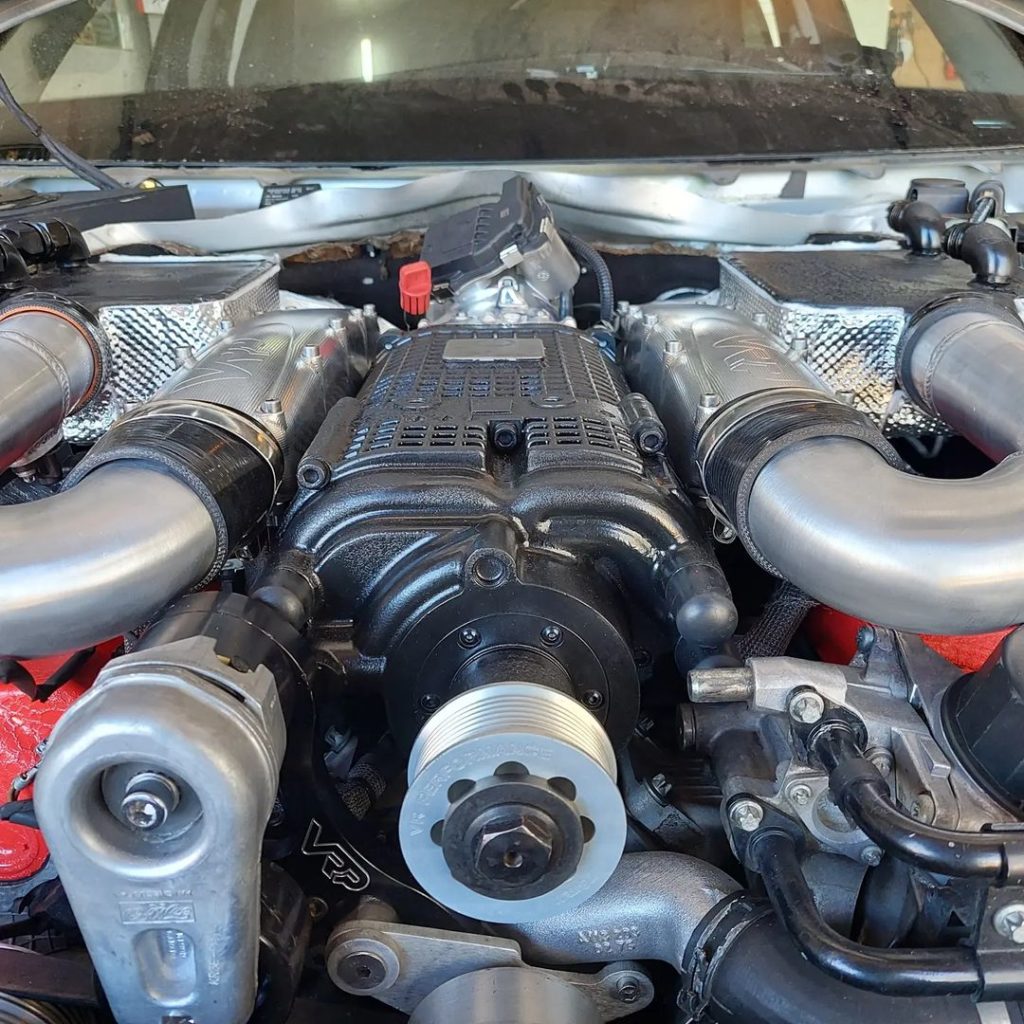
A common issue in the powerful M113k AMG engine is the threat of constant belt slip leading to an array of issues most AMG owners will want to avoid. Our HD DS Tensioner Kit alleviates the risk of this happening by aiding in keeping the belt tight.
This tensioner kit will allow you to install GT500 compatible tensioner and can be used in tandem with our Belt Wrap Kit.
This installation guide applies to the 20 LB and 50 LB options.
Before you begin: If you have a 20LB spring, use a rod and mallet to tap the bolt out. We will be using a bolt that is slightly longer than the bolt supplied by the manufacturer.
Step 1 & 2:
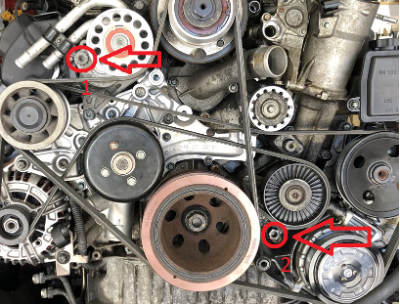
- Loosen and remove the supercharger belt.
- Loosen the serpentine belt and remove it from the 6 rib dual idler pulley. If you have a larger crank pulley ring, it is HIGHLY RECOMMENDED to use a pin to hold the tensioner back until the install is complete or you risk losing access to the tensioner.
Step 3:
Remove the factory Supercharger tensioner. (you will need to have the tensioner pinned into the back position)
Use an Allen wrench to hold it back
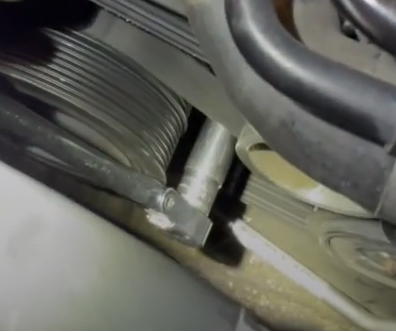
Step 4:
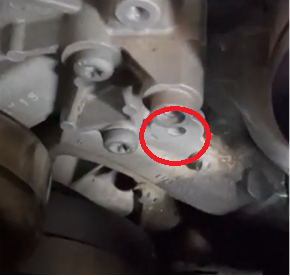
Using a 8m-1.25 Tap, Tap the unthreaded hole on the water pump.
Step 5:
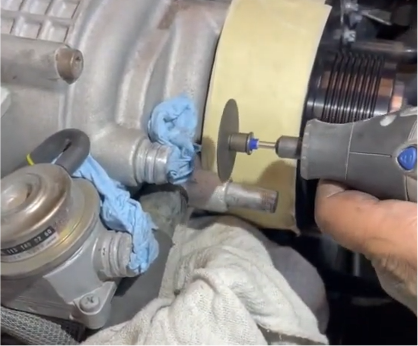
Using a dremel or or Grinder, cut the peg off of the front of the supercharger.
Cut approximately 1/4” behind the step down.
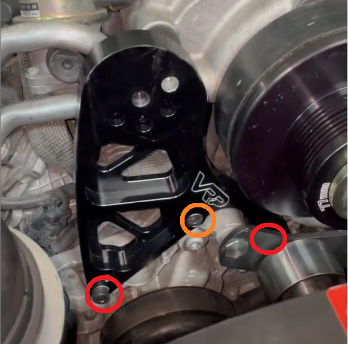
Step 6:
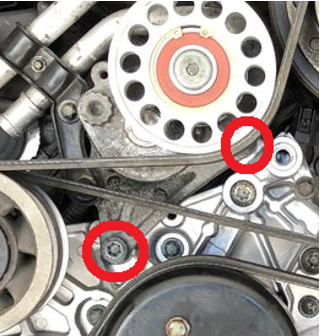
Install the VRP HD tensioner Bracket using the provided bolts.
Center bolt (Orange): M8 X 35mm
Side bolts (Red): 2x M8 45mm
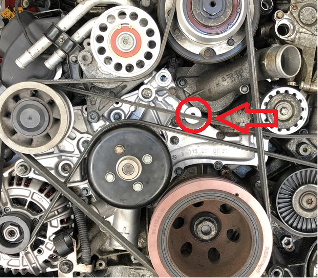
Step 7:
You must find your tension point based on your pulley setup. It’s recommended to hold the tensioner in the puck, and use the bolt (without the peg) to determine what orientation you would like your tensioner. By default the tensioner is at full lock, Set this position as close to the Supercharger pulley as you can without touching.
Once you are happy with this positioning, put the peg into the bracket and slide the puck into the corresponding location.
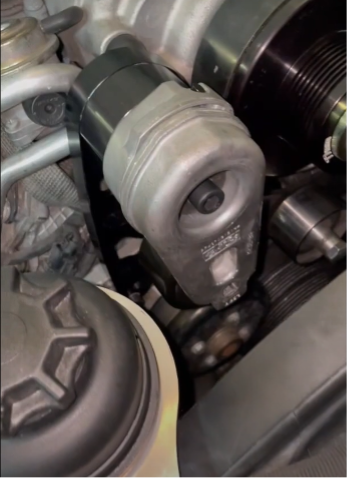
Step 8:
Install the tensioner using the supplied bolt and then install your belt.
20LB and Whipple 50LB tensioner: m10 X 85mm
ARS 50LB tensioner: m10 X 100mm